The goal of Azure Data Factory is to create a pipeline which gathers a lot of data sources and produces a reliable source of information which can be used by other applications. The pain of interfacing with every differnt type of datastore is abstracted away from every consuming application. You can have relational databases, flat files, whatever and create a pipeline which transforms and enriches the data. In an update published the end of March it was announced that you can also copy files. I wanted to try this out and it proved to be a bit more cumbersome than I first imagined. Let’s take a look.

After creating a data factory in your Azure account we’ll need the following components:
- Two linked services
- A connection to my on-premises folder
- A connection to my blob storage account
- Two datasets (also called tables)
- A dataset containing info on where my data is stored on premise and how many times per day it can be fetched.
- A dataset which has info on how and where to store the data in blob storage
- One pipeline which contains an activity which connects the datasets.
The connection to the on premise file is handled by an application which you need to install on-premise. By navigating to the linked services slice you can add a data gateway.

To configure a gateway you only need to provide a name, you can then download the data gateway application and install it on premise. After installing the application you need to enter the key which can be viewed in the Azure portal.

As far as the on-premise configuration, you are done. You do not need to configure any firewall ports but you can only install it once on a PC.
So far the wizards. Now we need to create the pipeline. After clicking on the “Author and deploy” tile. The browser navigates to an online editor.

You create linked services, datasets and pipelines by using JSON. When clicking on any of the menu options, you can select a template to get started.
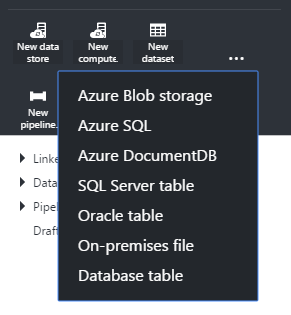
As mentioned earlier I needed two linked services. You can create those via the new data store option. The first one I’ll create is the on-premise file data store.
{
    "name": "OnPremisesFileSystemLinkedService",
    "properties": {
        "host": "localhost",
        "gatewayName": "mydatagateway",
        "userId": "BennyM",
        "password": "**********",
        "type": "OnPremisesFileSystemLinkedService"
    }
}
The options you need to configure are:
- host, which will be the name of the machine which contains the files/folder you need to connect to
- gatewayName, which has to match the name of the gateway which we created earlier
- a userid and password or encryptedcredentials to use to connect from the gateway to the target machine
- type, which needs to be OnPremisesFileSystemLinkedService
- name, which we will use later
The next one will be the connection to the Azure storage. You can get the template by clicking “New data store” and selecting “Azure storage”.
{
    "name": "StorageLinkedService",
    "properties": {
        "connectionString": "DefaultEndpointsProtocol=https;AccountName=bennymdatafactory;AccountKey=**********",
        "type": "AzureStorageLinkedService"
    }
}
The options you need to configure are:
- name, which we will use later
- connectionstring, which needs to match your connectionstring for Azure storage
- type, which needs to be AzureStorageLinkedService
Next one, the first dataset: on-premises file.
{
    "name": "OnPremisesFile",
    "properties": {
        "location": {
            "type": "OnPremisesFileSystemLocation",
            "folderPath": "c:\\Temp",
            "linkedServiceName": "OnPremisesFileSystemLinkedService"
        },
        "availability": {
            "frequency": "Day",
            "interval": 1,
            "waitOnExternal": {
                "dataDelay": "00:10:00",
                "retryInterval": "00:01:00",
                "retryTimeout": "00:10:00",
                "maximumRetry": 3
            }
        }
    }
}
The options you need to configure:
- again a name, which we’ll use later
- type, which has to be OnPremisesFileSystemLocation
- folderpath, where is the folder I want to sync. Note the double slashes.
- linkedServiceName, this has to be the same value which we used earlier when we created the data store for the on-premises gateway.
- availability, how many times will the on-premises file or folder by synchronized. What’s very important is the waitOnExternal. You have to configure this if the data is not produced by the data factory itself. In this case it’s an external source so I have to fill in some values.
Our next dataset is the Azure blob.
{
    "name": "AzureBlobDatasetTemplate",
    "properties": {
        "location": {
            "type": "AzureBlobLocation",
            "folderPath": "myblobcontainer",
            "linkedServiceName": "StorageLinkedService"
        },
        "availability": {
            "frequency": "Day",
            "interval": 1
        }
    }
}
Fairly easy to configure.
- again a name
- the type which has to be AzureBlobLocation
- the folderPath wich will be the path inside my Azure blob storage account which was configured in the linked service
- linkedServiceName, which has to match the name we used earlier.
Then the actual workflow, the pipeline.
{
    "name": "CopyFileToBlobPipeline",
    "properties": {
        "activities": [
            {
                "type": "CopyActivity",
                "transformation": {
                    "source": {
                        "type": "FileSystemSource"
                    },
                    "sink": {
                        "type": "BlobSink",
                        "writeBatchSize": 0,
                        "writeBatchTimeout": "00:00:00"
                    }
                },
                "inputs": [
                    {
                        "name": "OnPremisesFile"
                    }
                ],
                "outputs": [
                    {
                        "name": "AzureBlobDatasetTemplate"
                    }
                ],
                "policy": {
                    "timeout": "00:05:00",
                    "concurrency": 4
                },
                "name": "Ingress"
            }
        ],
        "start": "2015-06-28T00:00:00Z",
        "end": "2015-06-30T00:00:00Z"
    }
}
I will not go over every property. What’s important is that in the copy activity we tie our two datasets together. The start and end times indicate the time period our pipeline will be active. This is very important as I’ve not found any way you can pause a running pipeline. If for instance I indicated earlier that I want my folder to be copied every 15 minutes and indicate a start date in the pipline in the year 2010, the pipeline will do all historical runs! So be careful when you configure this as Azure Data Factory isn’t the cheapest service around.
Every time you create a linked service, dataset or pipeline you click deploy. The editor will then validate if all the names you mention are actually correct. The editor is quite good, as it even detects errors in datatypes and gives you help and intellisense (control + space).


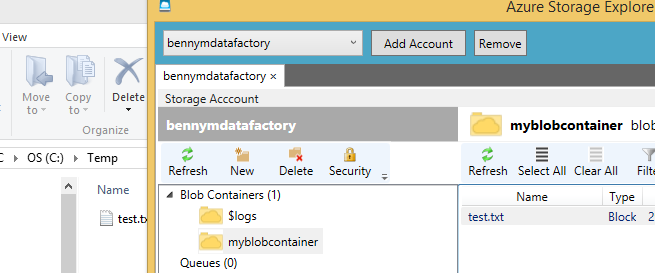
And with all this deployed, the folder is being synchronized online.
This is probably one of the most expensive file copy samples. In a next post I’ll investigate more features. One of the drawbacks of the current setup is that every time the sync runs all files are overwritten. All files are copied all the time as is.
Sources: